
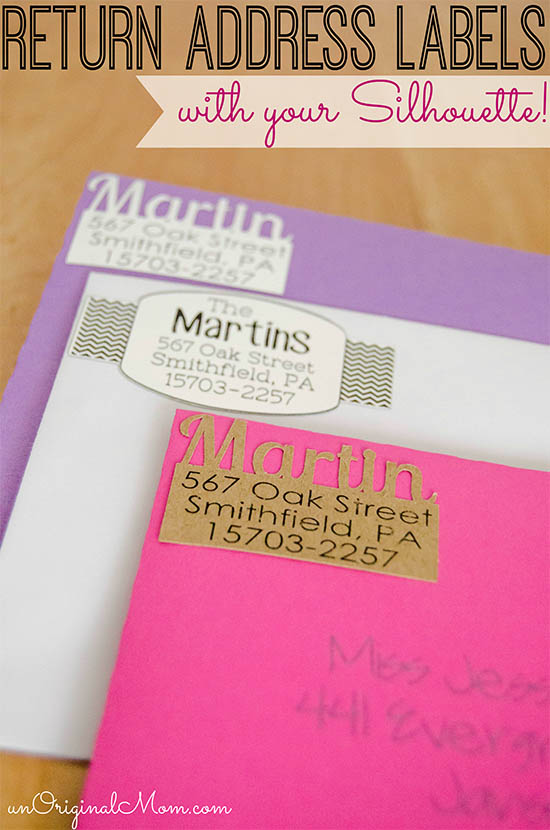
Ever since we moved to our new house 4 months ago (has it really only been 4 months??), I’ve been wanting to make some new, fun, personal, DIY return address labels. They just make mailing a letter so much more exciting, don’t they? I mean, nothing against those labels you get to guilt-trip you into donating as a free gift from a charity…but I wanted something with a little more personality.
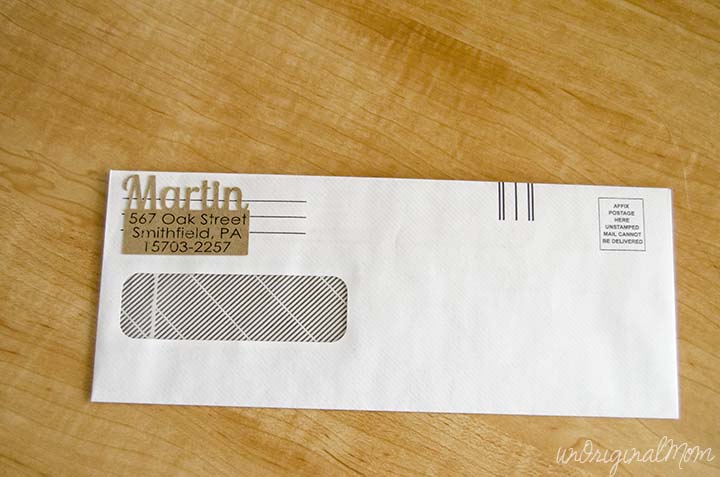
Of course, where else did I turn but my trusty Silhouette? Silhouette has an awesome line of “Print and Cut” materials…white and clear sticker paper, adhesive kraft paper, printable gold and silver foil, printable cotton canvas, even printable temporary tattoo paper! I decided to experiment with the white sticker paper, kraft paper, and silver foil.
Now, as I told you last week, I don’t have a functioning color printer…and I have a barely-functioning laser printer that is seriously low on toner….so this was a bit more of a challenge. I was trying to think of a way to bring that “wow” factor (well, as much “wow” factor as there can be in a return address label) with only black ink. (I shared a tutorial on how to do print and cut with color copies from a print shop if you need copies on regular paper or card stock, you can see that HERE.)
After a bit of brainstorming, I came up with an idea inspired by the ever-popular “A Thousand Thanks” Card by Lauren of The Thinking Closet…create a cut-out of the last name to pop out above the label! It looks great, and couldn’t be easier to design…here’s a quick tutorial!
Type your last name in your desired font. If you have any letters that “dangle” – like y, j, p, etc., you’ll need to pick a font that is all caps- I like something like the free font Pharmacy. If you choose a script font, be sure to weld your letters first, including the dots of i’s and j’s! Then, draw a rectangle the width of your last name, with enough height to fit in your address. Slightly overlap it with the bottom of your name. Finally, select your rectangle and your name, then weld them together! Then type your address into the box, being sure to fill it in with your desired color so that it will print.
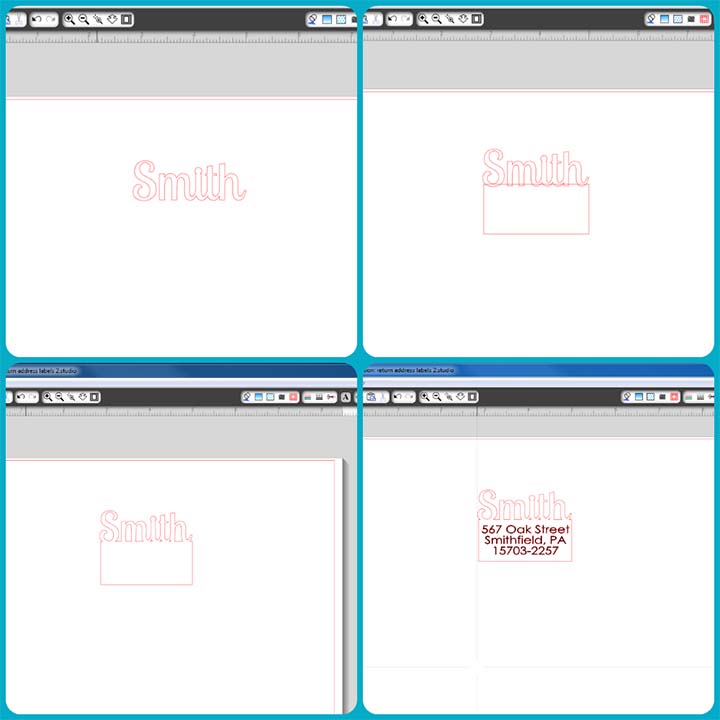
Add your registration marks (this is what the Silhouette will “read” after you’ve printed to orient itself on the page), and then you can use the “fill page” option in the replicate menu to fit as many labels onto one page as possible.
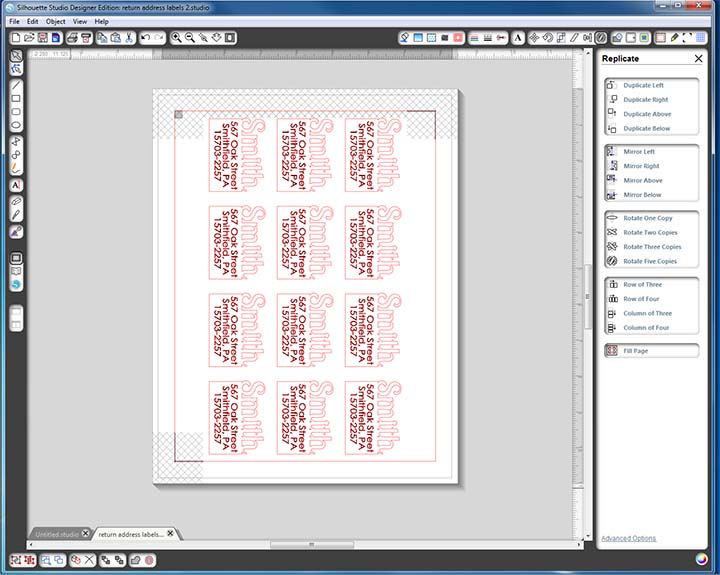
Now, print! The software will take you through everything you need to do to read the registration marks and then cut.
A couple of important tips – make sure you go into the Cut Style menu to mark your text as “no cut.” The only thing you want to cut is the outline! Also, my machine had a heck of a time reading the registration marks on the silver foil and the kraft paper. Use a flashlight to help your machine “see.” Take the blade out and hold up a small flashlight vertically, shining down, where the blade cartridge goes.
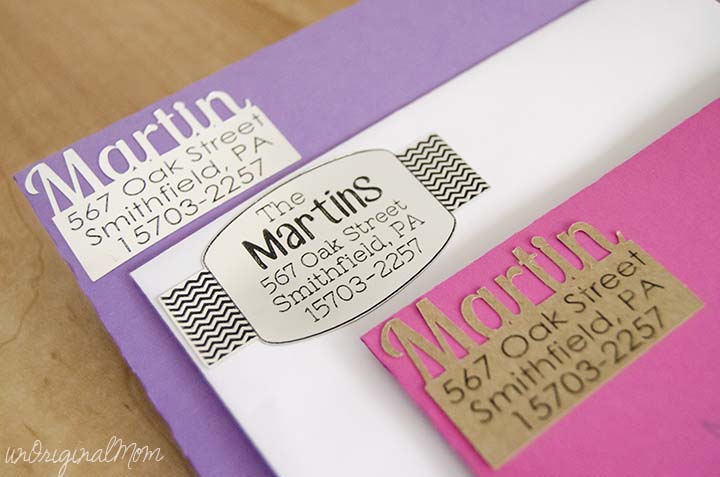
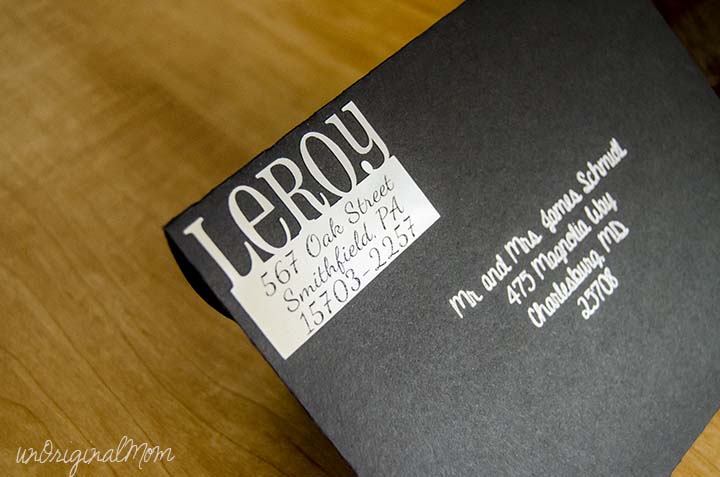
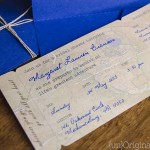
The design cut PERFECTLY on the foil and kraft paper. I was really impressed! I think I could have even gone a smaller and not had any problems.
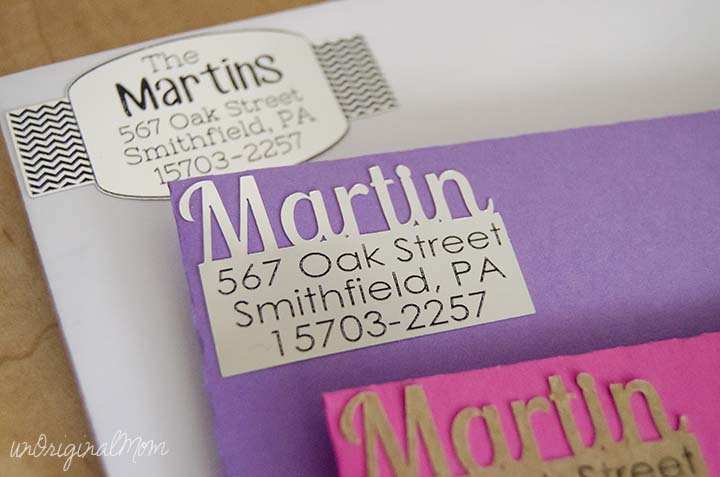
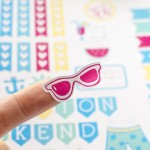
Here’s a hint when using the white sticker paper…make sure you know which side is the sticker and which side is the backing before you cut. Oops. Once I figured it out it did well! You may need to slow the speed down a little bit from the recommended settings to get a clean cut. But I love how the sticker paper pops against a brightly colored envelope!

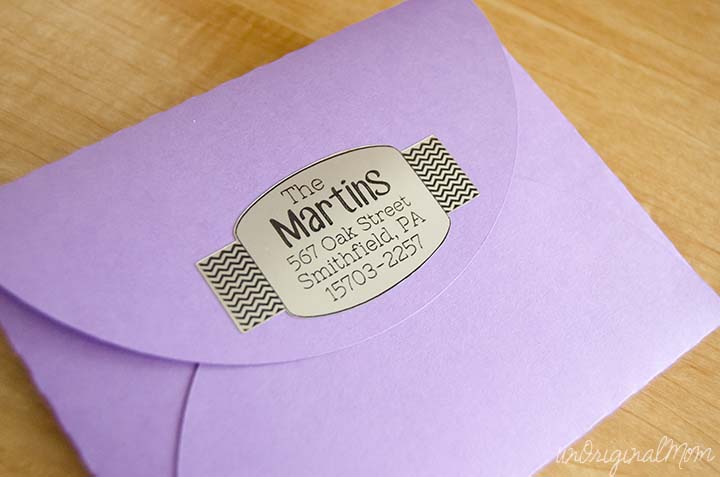
I also came up with another fun design that looks FABULOUS on the printable silver foil! A little trendy chevron and some fun fonts, and presto – a fun DIY return address label!
There are so many possibilities with these labels…the foil is perfect for fancy party invites (with envelopes addressed in Silhouette sketch pen, of course!), or would even be really neat for wedding invitations!
And it’s so easy to make a few sheets of these at a time to always have some on hand. It could even make bill paying fun!
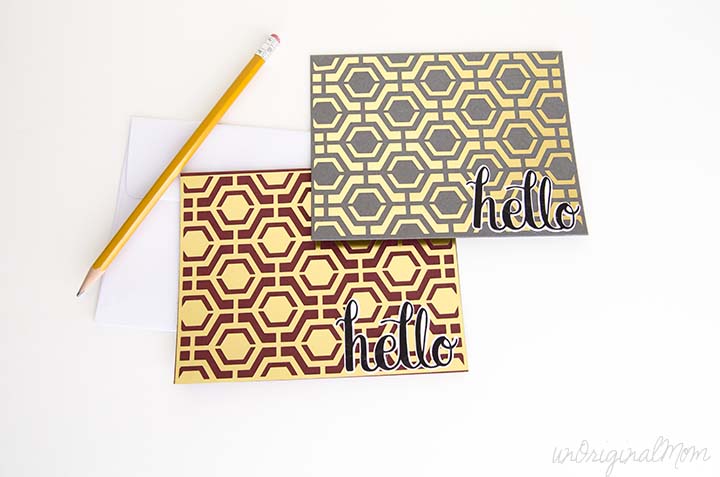
Looking for another project to make with the printable gold and silver foil? Check out these Easy Geometric Cards with Gold Foil!
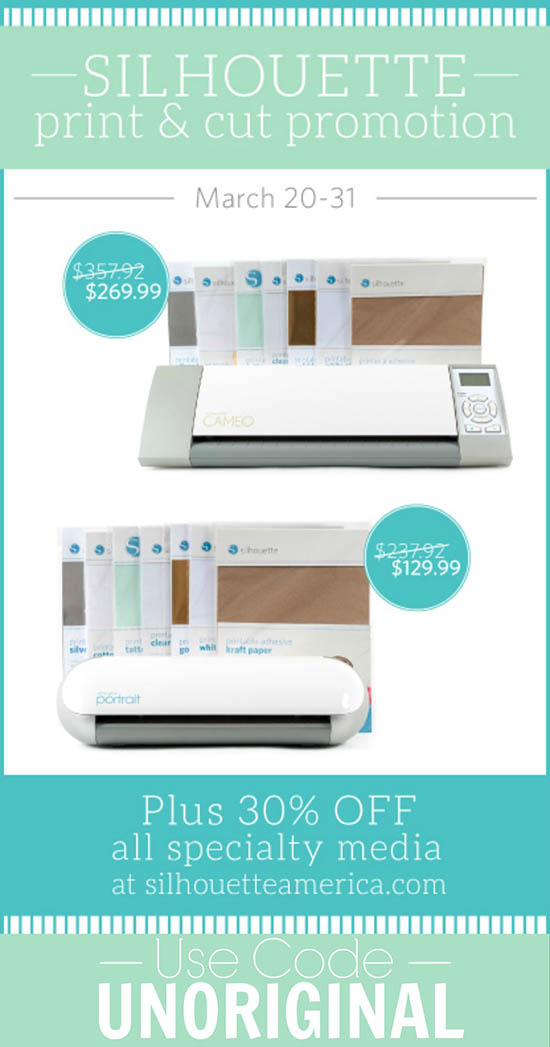
Silhouette Promotion
Silhouette is running a FANTASTIC promotion March 20-31st (2014) – Cameos and Portrait bundles are on sale for a great price! Plus they come with everything you’d ever need to get started printing and cutting. unOriginal Mom readers can get these bundles at the following prices by using the code UNORIGINAL at checkout!
Silhouette CAMEO® Bundle – 357.92 $269.99
- 1 Silhouette CAMEO®
- 1 package of temporary tattoo paper
- t package of printable adhesive kraft paper
- 1 package of printable adhesive gold foil
- 1 package of printable adhesive silver foil
- 1 package of white sticker paper
- 1 package of clear sticker paper
- 1 package of printable adhesive cotton canvas
Silhouette Portrait™ Bundle – $237.92 $129.99
- 1 Silhouette Portrait™
- 1 package of temporary tattoo paper
- t package of printable adhesive kraft paper
- 1 package of printable adhesive gold foil
- 1 package of printable adhesive silver foil
- 1 package of white sticker paper
- 1 package of clear sticker paper
- 1 package of printable adhesive cotton canvas
Already have a Silhouette? All specialty media is 30% off! That’s everything that’s listed above, plus a few more great products like magnet paper, double-sided adhesive, vellum, washi paper, and more…time to stock up! Remember, use the code UNORIGINAL when you check out to get these great prices!
Want to learn more about the Print & Cut possibilities from Silhouette? Here’s a handy video for the visual learners:
What’s your favorite Silhouette crafting medium?
Psssst! Right now I’m giving away a FREE 11 page printable meal planning guide as a gift for new email subscribers – sign up by clicking HERE and have the freebie delivered straight to your inbox!
Disclosure: I was provided product to use for this post. As always, all thoughts and opinions are 100% my own…cause you know I LOVE my Silhouette!


Subscribe to unOriginal Mom via email and get instant access to my library of FREE Silhouette Studio & SVG cut files - exclusively for email subscribers. Plus there's a new file added every month!


Meredith, these are awesome! I might steal this idea for our annual handmade Christmas cards!
So glad you like them, Kristy!! They would be a great touch for your handmade Christmas cards. The gold foil would be perfect!
LOVE!!! These would be perfect on party invitations! I am pinning now :)
Thanks, Dee! These are definitely great for party invites of all kinds…in fact, I may or may not be trying to come up with something I can send out just so I can use a bunch of these, haha…
Genius idea. You are certainly correct in that they are unique. I’ve been wanting to do something similar with my business logo so I can put them on our generic pizza boxes. Now you’ve given me the visual to go ahead and create a very different sticker that people will remember.
Thanks so much, Karen! I would love to see a photo of your sticker once you’ve made them…so glad I could pass on a little inspiration! :-)
These are so savvy, Meredith! I love seeing them in the different mediums, too. (I think the foil is my fave. Lovin’ that stuff!) And I’m so glad my Thousand Thanks card gave you some inspiration here. But as always, you’ve taken it and run to new heights. Pinning this stat!
Yeah I agree, the foil is definitely my favorite…it looks even better in real life! Though the sticker paper and kraft paper are fun on the colored envelopes, too. Thanks for the inspiration, friend!
Thank you so much for sharing this tutorial. It’s so clever and adorable!
Thanks, Kat!!
Love these Meredith!
Fabulous idea, I love a cute address label. The last name really pops on these.
These address labels are gorgeous! I love them! This is making me want a silhouette even more!
Thanks Carrie! Just so you know, a Silhouette will completely change your crafting life…consider yourself warned! ;-)
Now, how clever is that?!!! I am so gonna do this…maybe with my little store name too! That should get some attention! Thank you for sharing this darling idea!
Oh, that would be such a great idea for business mail and packages – it would add such personality! If you make them, be sure to send me a photo, I’d love to see!
I am a letter loving gal and your return address labels got me excited – not only are they beautiful, but it means you must write letters! Nothing like some snail mail to make someone’s day. I think the label with the ‘chevron’ like pattern is my fav for sure. Visiting you via “Create,Link,Inspire” linkup
I love snail mail – sending and receiving! I’ve stocked up on all of the different styles so I can put them on all our outgoing mail :-) Glad you like them!
Cute idea – pinned this!
Thanks Courtney! And thanks for the pin :-)
Ok I am so sorry to bug you with this silly question but how did you get your kraft paper labels to stick? Did they come with a sticky backing or are you gluing them to the envelope. I want to make these as a gift for a client. Thank you!!!!
Not a silly question at all, Breanna! I used the printable adhesive kraft paper from Silhouette – it’s like one big kraft paper sticker. So when you cut it, you have individual stickers that you just peel off and stick! Super easy. I just printed and cut a whole sheet of them and have been peeling them off one by one to stick on letters as I need them!
Great tutorial, and super cute, too! I was thinking about doing some on white label paper, but printing the last name in color before cutting. When welding, is it possible to have the top letters one color, while the address box part stays white? When I welded, everything took the letter color. Trying to save on ink. Thanks!
Thanks Leslie! I think the best way to get just the name to print in color without filling the whole shape is to overlay the text on top of the shape – so before you weld the text to the rectangle, make a copy of the text and drag it out of the way; then weld the text and rectangle and leave it blank with no fill; then drag the copy of the text back so it lines up on top of the cut text, and fill it with whatever color you’d like. Just be sure to set the text to “no-cut” after you’ve print it! Hope that helps!
Do you know the name of the font you used for “Smith”? I have looked through the ones I have and don’t have anything similar. Thanks!
Hi Rita, it is the free font called “Lobster Two” – one of my favorite go-to fonts, I use it all the time!
Can’t wait to make my own labels
I’m making these this morning. Thank you for the great idea! They turned out awesome.
[…] Foil, Printable White Sticker Paper, and Printable Adhesive Kraft Paper for her super cute and creative address labels. LOVE […]
Super cool labels!!! I love them! What font did you use on the black envelope and the label address?
[…] Unoriginal Mom Step-by-step tutorial […]
What font did you use to address the black envelope? I am looking for script fonts to use for addressing wedding envelopes with a sketch pen in my Silhouette. If you have any suggestions for script fonts which work well, please let me know! I am having a tough time finding ones that are thin enough that they don’t leave a “hole” in the middle of the letter. Thanks!
Hi Jamie! I used a font from the Silhouette online store, actually, it’s called Dresden Sketch. I bought it specifically for sketch pens, since it only has a single cut line for the letters. Another way that’s helpful to “fill” fonts that have space in the middle is to use the internal offset tool – that will add some more lines in the middle of the letters so it looks like a solid filled shape. Hope that is helpful!
Oops, I am wrong! Now that I go back to the post I see I didn’t post the picture I used with Dresden…that font is “A Gentle Touch” – it’s not a single line font, but I think I used the internal offset tool trick to fill it.
SO CUTE!!!
I see that you printed using a laser printer. I only have a laser printer, but I’m nervous about damaging the printer, and I think Silhouette recommends ink jet only. Which materials have you been able to run through your laser printer successfully? Are there any I should definitely not try?
Hi Melissa,
I’ve never had any trouble using my laser printer with any Silhouette specialty media…I’ve tried the gold and silver foil, kraft paper, white sticker paper and clear sticker paper. All have turned out great! I don’t see how it could damage the printer, either, as long as you put it through the manual feed to avoid paper jams.
Thanks, Meredith! I printed on the printable magnetic sheets today with my laser printer,, and it turned out perfectly! I haven’t printed on foil yet, but I’m sure it’ll be fine.
Hi-I just got my Silhouette and I love this idea. Just one quick question. what size font did you use? I don’t even know how to start figuring this part out.
Short answer – it doesn’t really matter! Create the label in whatever size you want, and then at the end it’s really easy to re-size to any dimensions you’d like. I’d say my final labels probably ended up around 2″ wide and about 1″ tall, but I started with it much bigger on my screen and then worried about the final dimensions at the end. One easy way to know what approximate size you’re dealing with is to click “reveal cutting mat” and then you’ll be able to see the 1″x1″ gridlines. The thing about the Silhouette is that the more you use it, the easier it becomes…until it is just second-nature! You’ll get the hang of it quickly, just allow yourself to experiment with it a bit :-)
I LOVE the label with the chevrons! Was this a shape in the Design store or did you create it?
I think I actually made that one myself Jen…I used the pattern fill tool to add the chevron print to the sides, and other than that it’s just a rounded rectangle welded with two regular rectangles on either side!
I came to your blog after Silhouette School sent us over to see your rosette wreath. I am definitely going to try these address labels soon!
I have a question. You mentioned how your machine had a hard time seeing the registration marks and I’m having that problem just on regular paper. So when you take the blade out and put in the flash light, does it give you the time to replace the flashlight and reinsert the blade? Hope that makes sense!
Thanks!
Yes, the registration detection is a separate step, and you have to tell the machine to start cutting from Studio when you’re ready – so yes you can put the blade back in before you tell it to cut! Another thing you can do is take a sharpie and trace over the registration marks to make them a bit darker, that’s worked for me sometimes too!
I love this idea. Could you do this with a Cricut machine?
Hi Heather! I’m sure that a Cricut could cut this, but I’m really not familiar with the design capabilities of Cricut’s design program so I can’t say for sure…if you’re able to type text and weld it with shapes, you definitely could!
[…] Branches Decor-Riley Huggins Valentine’s Day Mason Jars etched glass- Essentially Ecletic Mailing Address Labels- Original Mom Vday Cards- Etsy 3d Heart Card for Valentines Silhouette Project Valentines Envelopes- Martha […]
We are getting ready to send out invitations to my sister’s wedding, and I love this idea! I was wondering if I need the special PixScan mat (I think that’s for something different, actually looking at it…), and if this could be done with sticker paper that’s not from Silhouette’s line? Their paper is a little hard to track down on Amazon.
Nope, no PixScan required – just be sure to add the registration marks on your file and they’ll actually print on your paper, then the machine will read those. I’ve had success with other sticker paper that’s not from Silhouette, so that should work fine! Be sure to do a few test cuts to get your cut settings correct first, and then you’ll be good to go!
These are so cute! What font did you use for the address on the foil labels? Thanks!
Thanks Shelley! I believe those fonts are CF Jack Story and Nixie One.
Love it! Trying to replicate for our return address labels on our wedding invitations. On the black envelope, did you use the silver foil to make the return label? Cutting out the name wasn’t a problem with the foil! Also, what dimensions are these return labels? Thanks for the great idea!
Megan
Hi Megan, glad you like them! Yes the one on the back is out of silver foil, it cuts really well. I don’t remember the dimensions off hand, probably about 1″x2″ but you could make them any size to be proportional to the envelope you’re using.
I am trying to do the address labels and it is cutting all the address information not just the outline. I changed my cut options to no cut. what am I doing wrong?
Check to see if you have a duplicate of your text hiding underneath…sometimes I’ve accidentally duplicated an image and have the top one set to no cut, but the one underneath is still set to cut. You’ll need to make sure that the only thing set to cut is the outline. Hope that helps!
I am trying to make these return address labels. I can get my computer to print the address OR my Silhouette to cut the name and connected rectangle. When I try to print everything so I can cut all, it doesn’t happen. Do I have to do another step before sending to the printer with the design and registration marks? I’m following your directions to the letter but it’s not working. Any helpful hints? Thanks for any help!
So, you should print (with registration marks turned ON), then load the page on your mat into your machine, then send it to cut. Make sure when you do that that the outline is set to cut and the address is set to no cut – maybe that’s the problem? I hope that helps!
My printer keeps jamming my sticker paper when I go to print!? UGH…My printer prints cardstock, so I don’t know what is going on. I REALLY want to make these, they are super cute!!
[…] Adreslabels […]
What a creative way to personalize your return address labels! The idea of having your last name pop out above the label is brilliant. It adds such a unique touch and makes the labels stand out. It’s amazing how a simple DIY project can bring so much joy to everyday tasks like mailing letters. Can’t wait to try this out myself!
Love the idea of using Silhouette materials! Can’t wait to see how your DIY labels turn out.
Your products blew me away hero clicker, you’re full of ideas!