This post contains affiliate links – click here to read my full disclosure.
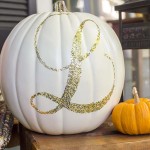
It’s been almost 11 months since we moved into our house…so this is our first Halloween with a “real house” and, from what we hear, LOTS of trick-or-treaters! I’ve decorated our front porch for fall with “pretty” decorations (mums in pretty planters, a straw bale, a wooden crate, our glitter monogrammed pumpkin, plus and a few other pumpkins) but I’m not usually one to go all-out with spooky Halloween decor. (Though that reminds me, I do have our Ping Pong Ball Ghost Lights to put out!)
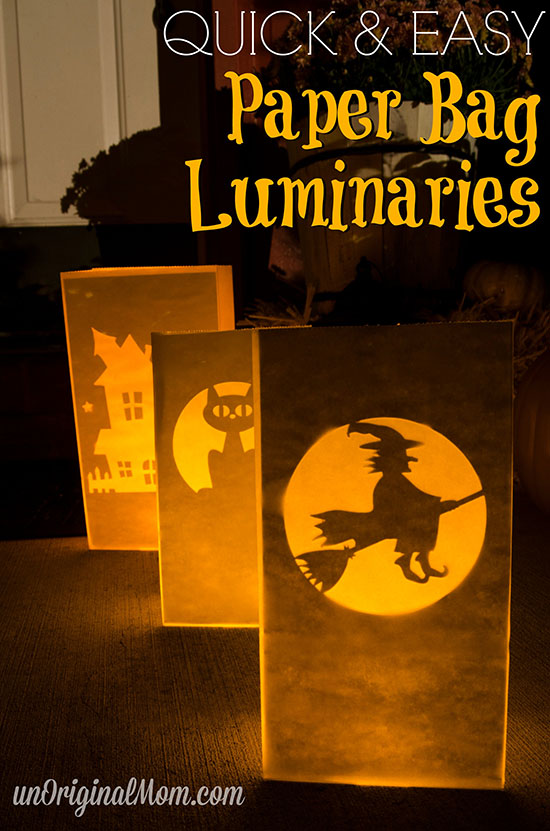
So, in searching for some simple and inexpensive decor for Trick-or-Treat night, I decided to try make some quick and easy Halloween Paper Bag Luminaries with my Silhouette. Don’t you remember making these when you were little – cutting pumpkin faces out of a paper bag, filling the bottom with sand, and putting some tea lights inside? It’s just like that…only a little bit fancier, because, well, we can :-)
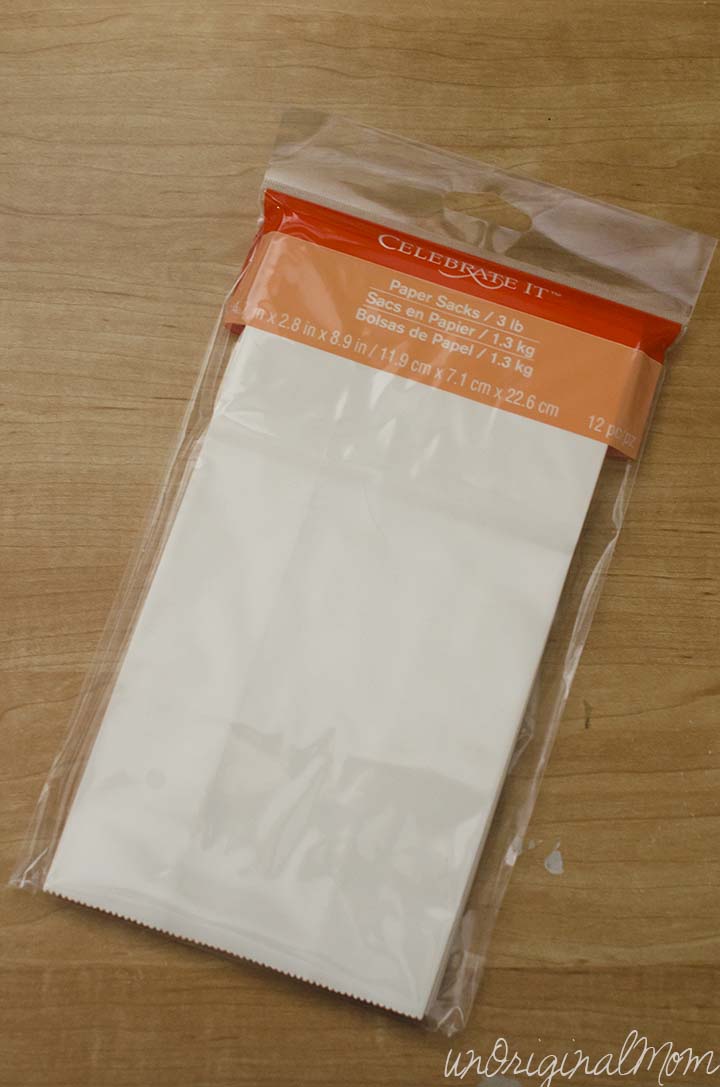
I picked up these white paper bags from Michael’s and then experimented a bit to find a technique that would give the best ratio of quick & easy to best final product, and came up with a few different methods for making luminaries with your Silhouette.
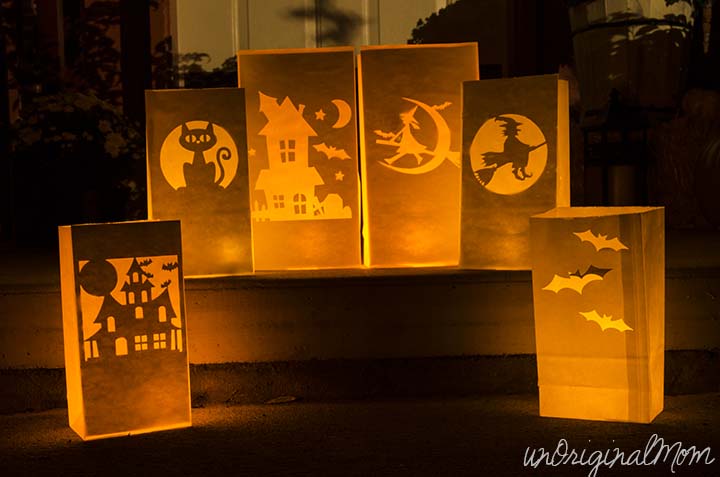
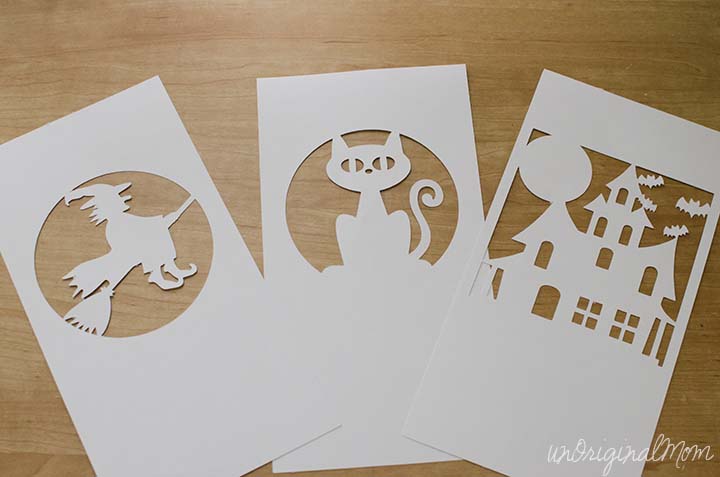
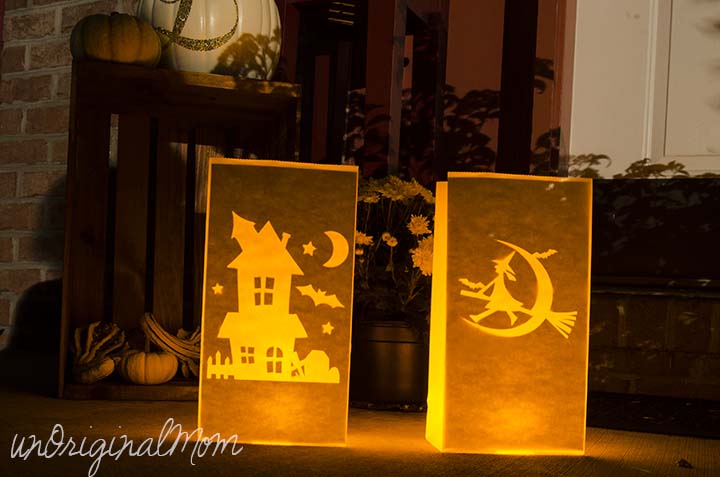
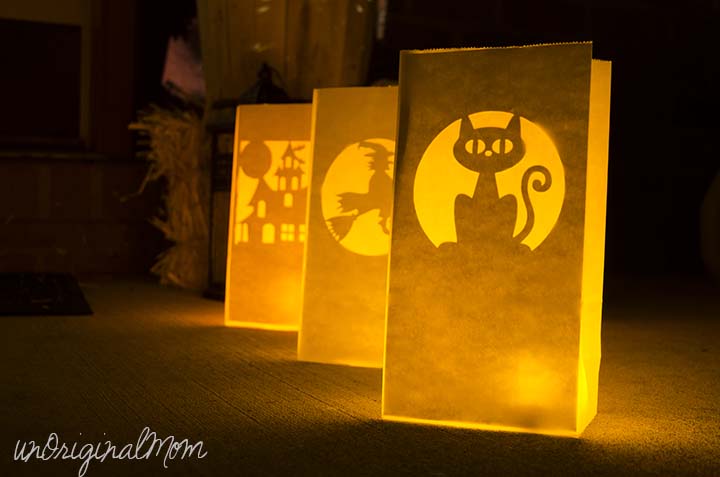
The first way I tried ended up being the winner – cut a silhouette of a Halloween shape from white card stock. The trick is to make sure the shape is all connected, so you don’t have extra little pieces to be attaching separately. I found three shapes in the Silhouette Store that worked really well for this – a witch, cat, and haunted house. A simple “release compound path” in Silhouette Studio allowed me to delete the outside border so I was left with a silhouette that would cut all in one piece. Then I added a rectangle the same size as the front of my paper bag, horizontally centered the shape inside of it, and cut out of plain white card stock.
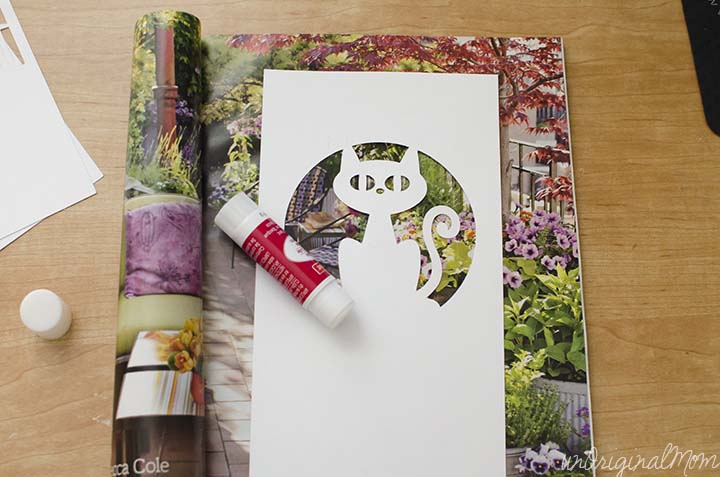
Then I just used a gluestick to glue the FRONT of the design to the inside of my paper bag. (Do you know the magazine glue stick trick? Use an old magazine as background scrap paper when you’re gluing…then simply turn the page when you’re done with that shape so you’re not setting your next shape down in half-dried glue! Life changing, I know!)
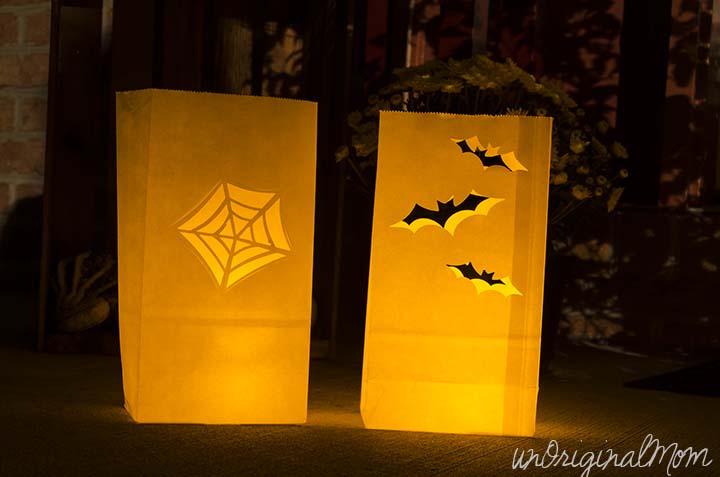
I did try a few other techniques to cut the bag directly with mixed results. Laying your paper bag on the mat and cutting it directly DOES in fact work on the regular card stock cut settings (cutting through both sides), especially with basic shapes. But you’ve got to fold the edges of the bag outward so that the cut goes through the front and back of the bag. The issue becomes getting your design perfectly centered on the bag…the PixScan mat worked well for that, though it was a bit time consuming with the extra bag folding, picture taking, importing the photo into the software, and placing the design – all that just for ONE bag. In that time, I could have made 2 or 3 of the other bags. (I used this technique on the bat bag, below.) The other method I tried was “dissecting” the paper bag to be completely flat by cutting down one long side and around 3 sides of the bottom, then placing it on the mat to cut, and reassembling with scotch tape. That way the design only cut through one side of the bag. (That’s how I did the spider web bag, below.) But again, lots of extra steps for essentially the same result.
I also tried a few more complicated designs in reverse silhouette that involved gluing extra little pieces inside the bag (see all those little window pieces in the big haunted house?), and it definitely wasn’t worth the extra effort compared to the other haunted house shape I found.
Even though all the bags ended up looking great (and of course, I’ll be using them all!), the simplest method was definitely the winner! I stuck some battery operated tea lights in them, and they look terrific on the front porch and sidewalk. You could whip up a few of these for your own porch in just a few minutes!
Want some more great Silhouette Inspiration?
It’s Silhouette Challenge Day! That means a bunch of other fabulous fall Silhouette projects on display by 24 other bloggers today…click on the images below or scroll down to the blog names to browse through them all!

1. Create & Babble // 2. Lil Mrs. Tori // 3. unOriginal Mom // 4. Zanaree // 5. The Kim Six Fix // 6. One Dog Woof // 7. Cupcakes & Crowbars // 8. Living My Given Life // 9. Architecture of a Mom // 10. Put A Bird On It // 11. Just Add Paper // 12. Weekend Craft // 13. Silhouette School // 14. Minted Strawberry // 15. My Paper Craze // 16. McCall Manor // 17. Chicken Scratch NY // 18. Mama Sonshine // 19. Creative Ramblings // 20. From Wine to Whine // 21. Please Excuse My Craftermath… // 22. Dragonfly & Lily Pads // 23. The Thinking Closet // 24. Simply Kelly Designs // 25. Sandpaper & Glue //
Do you have any favorite quick & easy ideas to decorate for Trick-or-Treaters on Halloween?
This post contains affiliate links – click here to read my full disclosure.


Subscribe to unOriginal Mom via email and get instant access to my library of FREE Silhouette Studio & SVG cut files - exclusively for email subscribers. Plus there's a new file added every month!






[…] Create & Babble // 2. Lil Mrs. Tori // 3. unOriginal Mom // 4. Zanaree // 5. The Kim Six Fix // 6. One Dog Woof // 7. Cupcakes & Crowbars // 8. Living […]
I like that you showed all the different ways that you tried!
[…] Create & Babble // 2. Lil Mrs. Tori // 3. unOriginal Mom // 4. Zanaree // 5. The Kim Six Fix // 6. One Dog Woof // 7. Cupcakes & Crowbars // 8. Living […]
your luminaries turned out so fun and cute!
I love how all of the luminaries turned out–even the ones you said were less than successful!
[…] Create & Babble // 2. Lil Mrs. Tori // 3. unOriginal Mom // 4. Zanaree // 5. The Kim Six Fix // 6. One Dog Woof // 7. Cupcakes & Crowbars // 8. Living […]
Fantastic!
[…] Create & Babble // 2. Lil Mrs. Tori // 3. unOriginal Mom // 4. Zanaree // 5. The Kim Six Fix // 6. One Dog Woof // 7. Cupcakes & Crowbars // 8. Living […]
These are so great! I will totally be making some in my (near) future!
Wow these are spectacular! What a great idea.
[…] Create & Babble // 2. Lil Mrs. Tori // 3. unOriginal Mom // 4. Zanaree // 5. The Kim Six Fix // 6. One Dog Woof // 7. Cupcakes & Crowbars // 8. Living […]
[…] Create & Babble // 2. Lil Mrs. Tori // 3. unOriginal Mom // 4. Zanaree // 5. The Kim Six Fix // 6. One Dog Woof // 7. Cupcakes & Crowbars // 8. Living […]
[…] Create & Babble // 2. Lil Mrs. Tori // 3. unOriginal Mom // 4. Zanaree // 5. The Kim Six Fix // 6. One Dog Woof // 7. Cupcakes & Crowbars // 8. Living […]
What a fantastic idea for the walkways this halloween! Love this!
Awesome Meredith and you’ve given us not one, but 3 techniques to try. They all turned out wonderfully.
[…] Create & Babble // 2. Lil Mrs. Tori // 3. unOriginal Mom // 4. Zanaree // 5. The Kim Six Fix // 6. One Dog Woof // 7. Cupcakes & Crowbars // 8. Living […]
They are so cool! my girl will love them. I am gonna make these too! Thanks for the inspiration :)
[…] Create & Babble // 2. Lil Mrs. Tori // 3. unOriginal Mom // 4. Zanaree // 5. The Kim Six Fix // 6. One Dog Woof // 7. Cupcakes & Crowbars // 8. Living […]
[…] Create & Babble // 2. Lil Mrs. Tori // 3. unOriginal Mom // 4. Zanaree // 5. The Kim Six Fix // 6. One Dog Woof // 7. Cupcakes & Crowbars // 8. Living […]
These are so cute! Thanks for the tips and showing us the best way – that will save me time. I love when someone does that first ; ) Also, I didn’t know about the magazine glue stick trick – good one!
[…] Create & Babble // 2. Lil Mrs. Tori // 3. unOriginal Mom // 4. Zanaree // 5. The Kim Six Fix // 6. One Dog Woof // 7. Cupcakes & Crowbars // 8. Living […]
adorable Meredith! I will be doing this for Halloween!! I will need some quick and fun decorations for right after we move in!
These came out so cute! We are also in a new house for Halloween and I might try these to spruce up our walk way!
[…] Create & Babble // 2. Lil Mrs. Tori // 3. unOriginal Mom // 4. Zanaree // 5. The Kim Six Fix // 6. One Dog Woof // 7. Cupcakes & Crowbars // 8. Living […]
oh these area great! We’re hosting a pumpkin carving party next weekend and these would be perfect to decorate with :)
I love these! Love the vintage vibe :)
There is something about paper bag luminaries that screams fall- maybe that gentle, orange glow :)
Pinning!
Also, I would love if you share your luminaries with my fall themed party Big Autumn Bash:
http://milaslittlethings.com/2014/10/big-autumn-bash-the-link-party.html
xx
Mila
milaslittlethings.com
milawayable@gmail.com
[…] Create & Babble // 2. Lil Mrs. Tori // 3. unOriginal Mom // 4. Zanaree // 5. The Kim Six Fix // 6. One Dog Woof // 7. Cupcakes & Crowbars // 8. Living […]
Oh for fun! These are great!!!
[…] Create & Babble // 2. Lil Mrs. Tori // 3. unOriginal Mom // 4. Zanaree // 5. The Kim Six Fix // 6. One Dog Woof // 7. Cupcakes & Crowbars // 8. Living […]
OK. This? Genius. I especially love how you experimented with different techniques to see what worked best. I can’t believe that you were able to get it to cut through both layers without it sliding around. Great project!!
We will definitely be making these this weekend!
I love this idea!! So much easier AND cleaner than pumpkins! I will definitely try this. Pinned! Thanks for the idea :)
Adorable!!!! Pinned<3
[…] Halloween Paper Bag Luminaries by unOriginal Mom […]
[…] Halloween Paper Bag Luminaries from Unoriginal Mom […]
These look awesome! I am wanting to make a bunch of these to line my driveway but I am kind of lost on how you did it. Ive tried reading the instructions a few times and still cant quote figure it out. Where do you fing the shapes? Did you buy those shapes already precut? If so, what did you use to make the cuts so perfect? Did you find a shape and then trace it onto white card stock and make ths cuts and then paste the card stock directly on the paper bag? Im lost and I hope to hear back from you soon through email. Thanks!
Hi Rachel! I used my Silhouette Portrait to cut the shapes, so the post and tutorial is all about how to make luminaries using a Silhouette. I’m sorry that was confusing! you could try a similar technique by printing our Halloween shapes on card stock and cutting them with a exacto knife…I’m sure you could find some free clip art images that would work! Hope that is helpful!
If all of the materials are white, where does the orange glow come from?
I used battery operated tea lights that had an orange cast to the light…when you put them in the dark, they really have a neat yellow-orange glow to them!
[…] Add some bloody hand print window clings from Felt Magnet and paper bag luminaries from the unOriginal Mom to enhance your party’s outdoor ambiance even […]
These are totally too creepy and its a quick and super easy craft for children to make for Halloween.
[…] 9. Paper Bag Luminaries | Unoriginal Mom […]
[…] Halloween Paper Bag Luminaries […]
[…] Unoriginal Mom […]
[…] Light the way for trick-or-treaters with this DIY Halloween idea via Unoriginal Mom […]
[…] See the full instructions on Unoriginal Mom. […]
[…] Halloween Paper Bag Luminaires […]
[…] Found at Unoriginal Mom […]
[…] bags, Halloween silhouettes, a glue stick, and battery-operated tea lights.Get the full tutorial on Unoriginal Mom.What you need: Balloons, purple and black tissue paper, double-sided tape, a permanent marker, […]
[…] easy way to set the mood with lighting is to make your own paper bag lanterns. To make them, cut some Halloween-themed shapes into your bags such as pumpkins, ghosts, witches, […]
These Halloween Paper Bag Luminaries sound like such a fun and nostalgic DIY project! Using your Silhouette to create intricate designs is a brilliant idea. I love how you experimented to find the best technique, and the results must look fantastic with the tea lights glowing inside. Your porch decorations sound lovely too – it’s great to hear about your first Halloween in your new house!
This is so fun! Love the idea of making Halloween luminaries. Can’t wait to try it. Your porch decorations sound lovely too!
[…] These are seriously cute yet entirely low key and easy to put together. You can check out the full scoop at Unoriginal Mom and make your own set of paper bag luminaries! […]
It’s really easy and fun to play online games at TERATAIBOLA, there are lots of attractive prizes that you can win